The building block of a System Moment is a Canvas. Use Bright's layering tool to make screenshots of your system dynamic and test learners' navigation proficiency.
Creating a canvas is one of the more advanced Admin capabilities in the Bright platform. In this article we will give you step-by-step directions on how to add screenshots, create layers and set parameters so you can test learner proficiency. We highly recommend viewing the Bright Academy videos on Basic and Advanced Canvas building which you will find at the end of this article.
Before we begin, it is a best practice to create a baseline template for each system you are trying to prototype. There are many transactions that can happen in any given system, and if you have built one baseline canvas, it becomes very easy to clone a template and remove the steps or branches you don't need in order to train to a specific transaction. Start your first canvas by building out a strong template of the most commonly used transactions in that system and you will save yourself hours of repeat working time.
- Now that you've scrubbed your screenshots of any data or PII, you are ready to load them into your canvas. Navigate to the Canvas menu in the Admin console and click the + sign. If you do not have clean screenshots, return to this article to learn more.
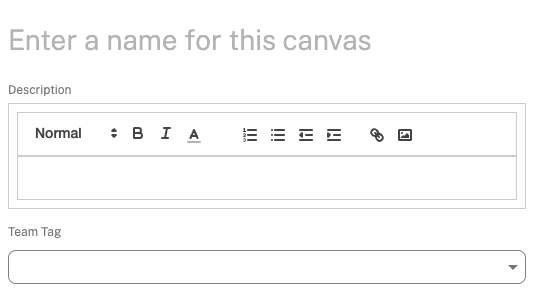
- Next Name your canvas and give it a description. It's important to include the name of the system you are prototyping (ie. System - Master Template, System- Escalate a Case 1, System- Verifying PII, etc.). You can also tag your canvas to a specific team for additional organization, however this is optional.
- Next, you can drag and drop your screenshots into the Screens box on the righthand side of the page. As you learned in a previous article, your screenshots should be numbered so that they are added to the system in the correct order of operations. This is important because Bright will automatically link each screenshot to the next one. If the screenshots are out of order, you can simply drag them to the right location and the 'link or jump' to the next screen will update automatically. See short tutorial below.
- Once your screenshots are in the correct order, click Save to create the Canvas.
- Next click on the title of the first screen. This will bring you to the Canvas builder. In order to quickly navigate to any of the screens in the canvas, pop out the navigation panel using the arrows in the upper lefthand corner. This will show you all of the screens you added, similar to a PPT deck. You can move screens around, delete them or add new screens all from this navigation panel. You can also select the "Back to Canvas" option to return to the main page to edit or add Autofill Fields as you build.
- You are now ready to begin placing layers on your screens. When you go to select a layer, it will always populate in the upper lefthand corner of the screen. Notice that all screens automatically come with the 'Jump' layer. This should be placed wherever the learner will have click in order to move to the next screen. Depending on what needs to happen on the screen will help you decide which layer types you need for your screen. Use the key below to see a description of all the layer types available in Bright.
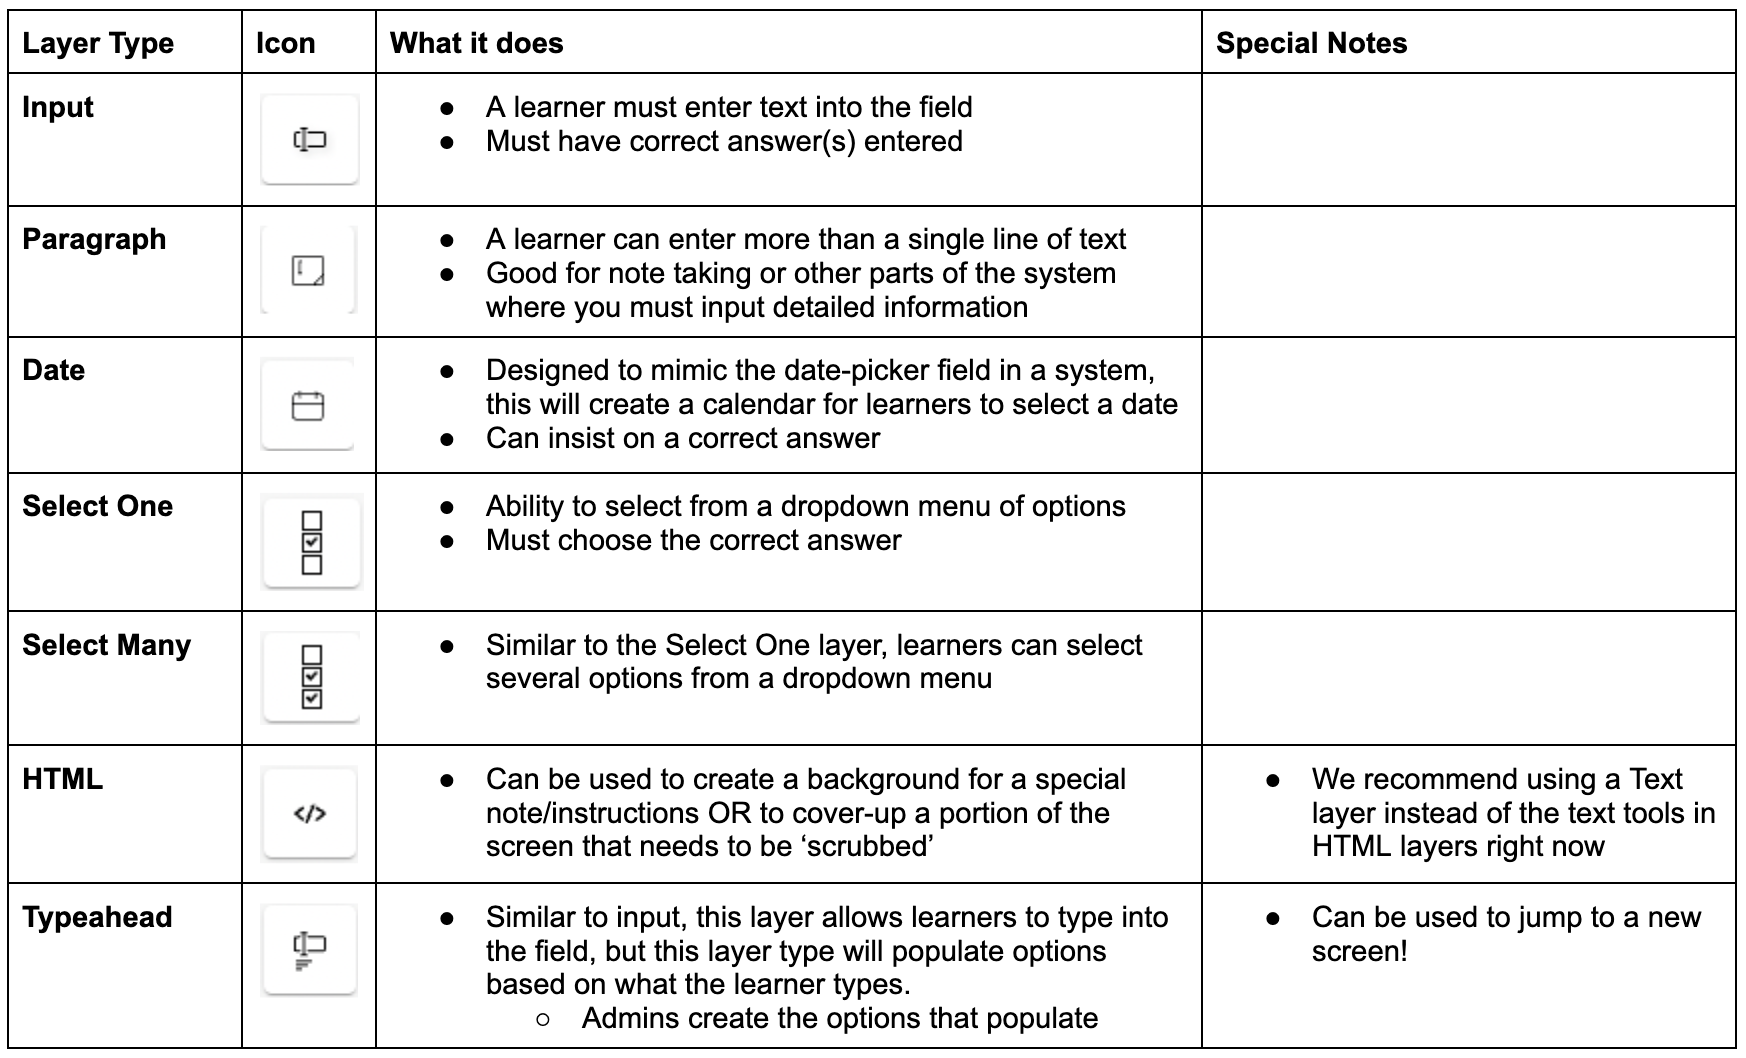
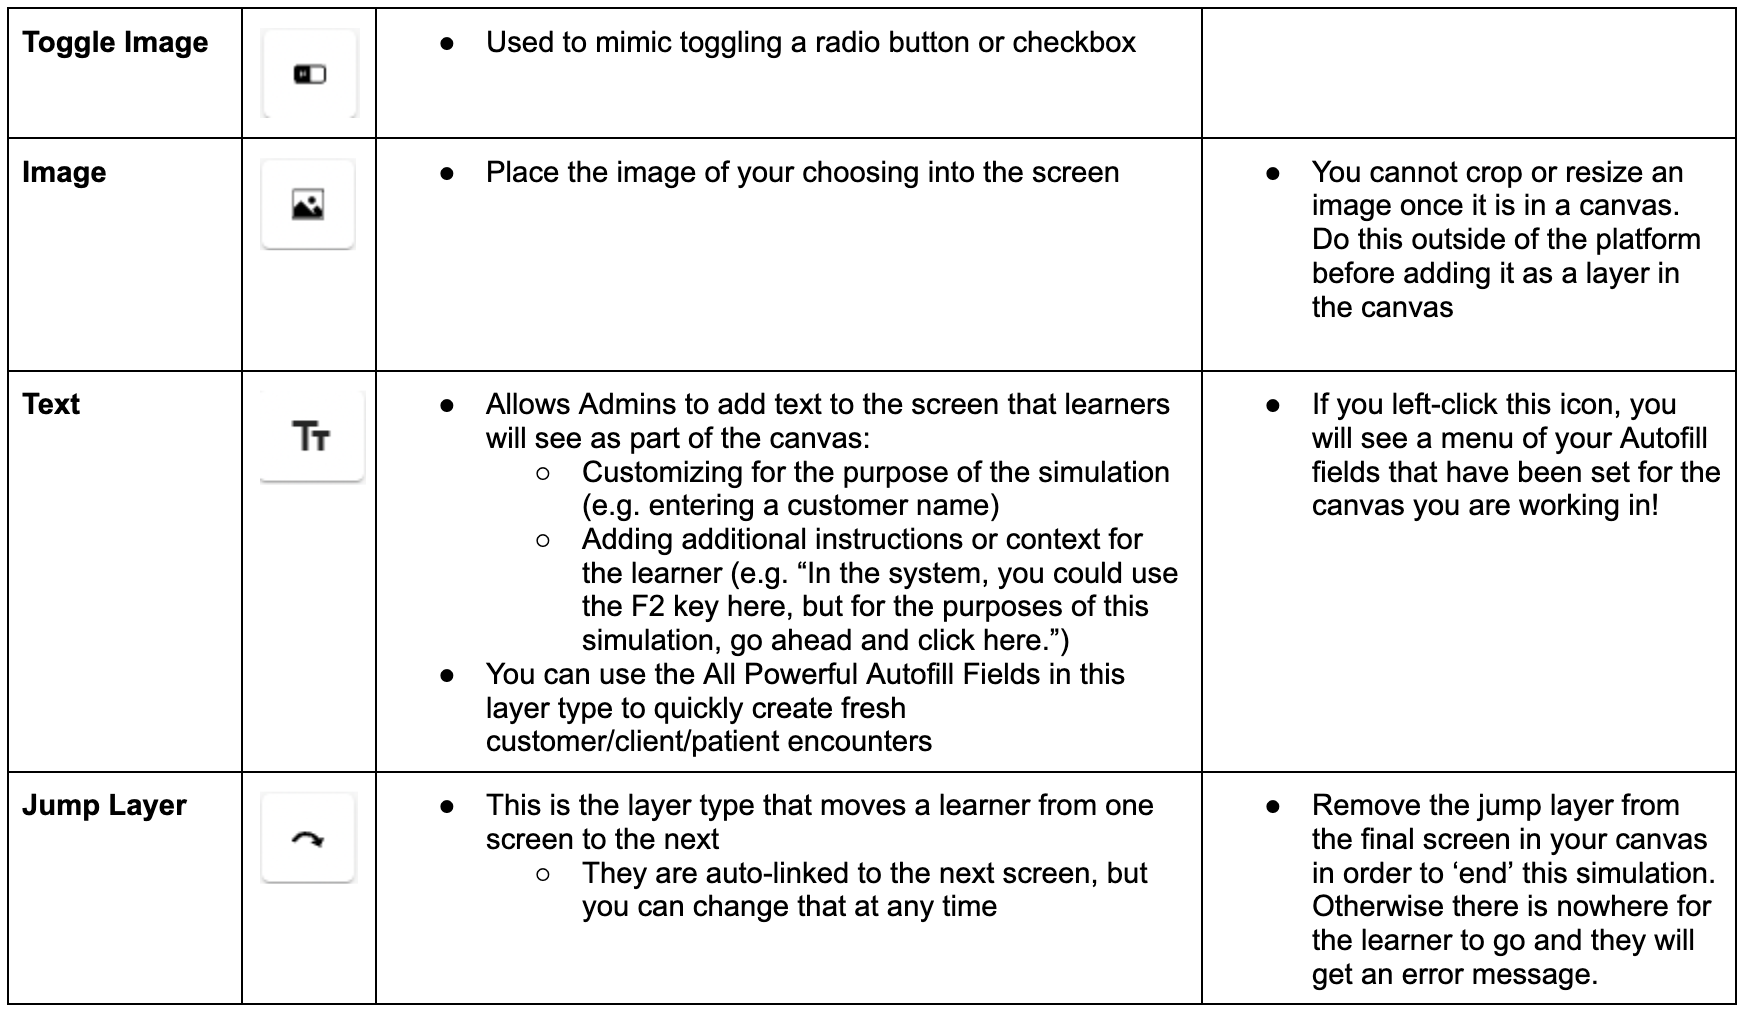
- There may be a variety of layer types that are needed on any given screen. The best example is if the learner needs to enter in new demographics in order to schedule an appointment or create a new lead in a CRM. You will likely need several Input layers to enter First Name, Last Name, Email. You may need to the Date layer to add the DOB, you may need the Text layer to add details about the campaign which is something that the system might automatically generate (not something the learner has to input). You may need to place a Toggle layer if you need them to confirm agreement and you may need a Select One layer to select their gender. See a tutorial below on how you place many different types of layers in different areas of your screen.
- Now that you've decided which layers need to be on the screen, you can begin filling out the details for each of these layers. You click on the layer directly on the screen or select it from the list in the lower righthand corner. This part is extremely important. Everything you enter in the details panel, the learners will interact with. This is also where you can force a correct answer, enter Help details, change the color, font, weight of the text and turn on click guides. It's important to start from the top of the details panel for each layer, and fill out all of the necessary details. You can always Preview your work to see what it will look like on the frontend by clicking the 'Preview' button. Please watch the below tutorial to learn more.
- Once you have placed all of the layers on your screen, remember to add the 'Jump' layer that automatically comes with every screen on the button or place where they need to click to move to the next screen. If any of the information that they entered on the screen does not match the correct answers that you've asked for, it will not allow them to proceed until they update that field. This is why including information in the Help Text is crucial. If the learner is tripped up, they can always press Help and learn exactly what they should enter into the different fields.
- Continue adding layers to each screen as necessary until your canvas is complete.
Additional Tips and Tricks
Cloning: In addition to adding layers, you may find that you need to clone a screen. You can do this quickly from the bottom of the page below the screen you want to clone. The cloned screen will appear directly after the screen you are on. You can then move it to the appropriate place in the flow. Be sure to keep the name of the clone different from the original, by default the system will add the word "Clone" to the end of the name.
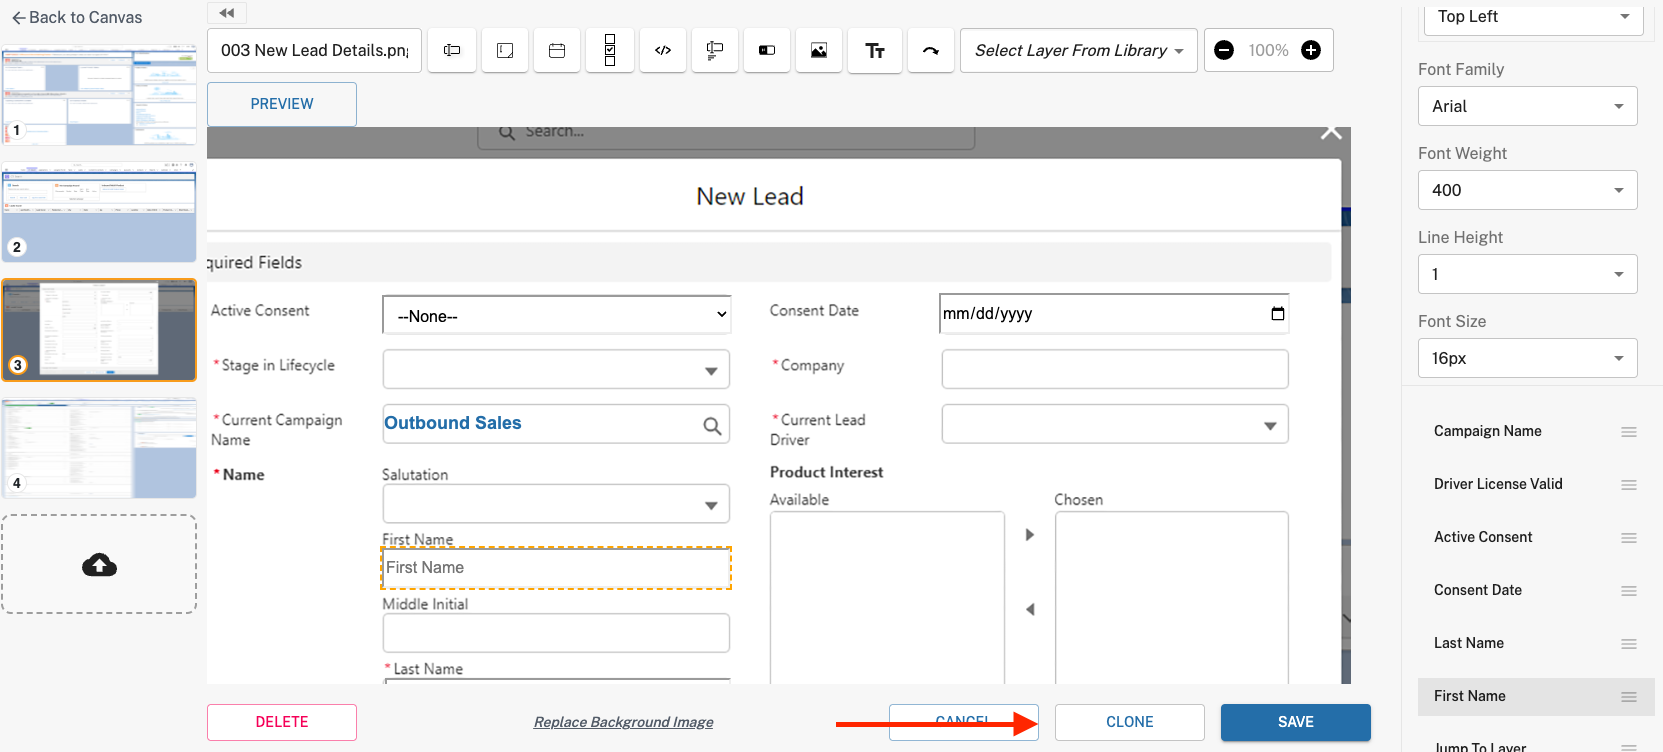
Replace Background: you may realize that the UI has slightly changed in your system and the page where you need to enter in the lead details looks a little different now. In order to keep your training up to date, you can quickly replace the screen while preserving all of the layer details. Once you replace the background, you may need to move the layers to new areas on the screen but you will not have to recreate these from scratch.
The Bright Academy Videos to walk you through canvases can be found in this simulation.
To continue to hone your Canvas skills, read our next article where you will learn about how to add layers to a library and leverage our Autofill feature to save time and create tight templates.