Stitch moments together to create a dynamic simulation
The first step to creating a Simulation is to remember that Simulations are made up of multiple Moments. Before you create a new simulation, consider what Moments you'll need, their order, and the overall simulation strategy.
When you're ready, visit the 'Simulations' menu in the Admin Portal, click the + sign in the upper left hand corner of the table and follow the steps below which will walk you through naming the sim, creating Moment Groups, and associating Moments and Resources to Moment Groups.
- Click to + sign to create a new simulation.
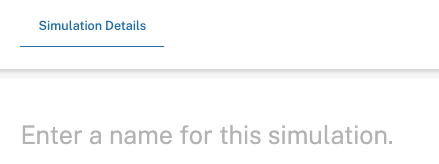
- Name your Simulation in the Simulation Details tab.
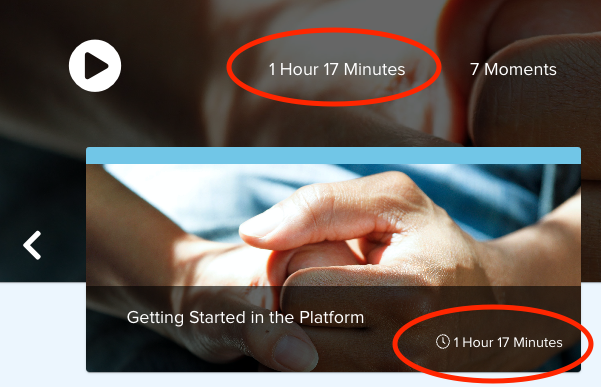
- Enter the Duration. This should be the sum of all Moment durations. Remember that this is text field and does not require a particular format (ie. 00:00 or 5 Minutes) but we do recommend consistency throughout your programs. The Duration will show up in the carousel, as well as the simulation box on the homepage. See the example below.
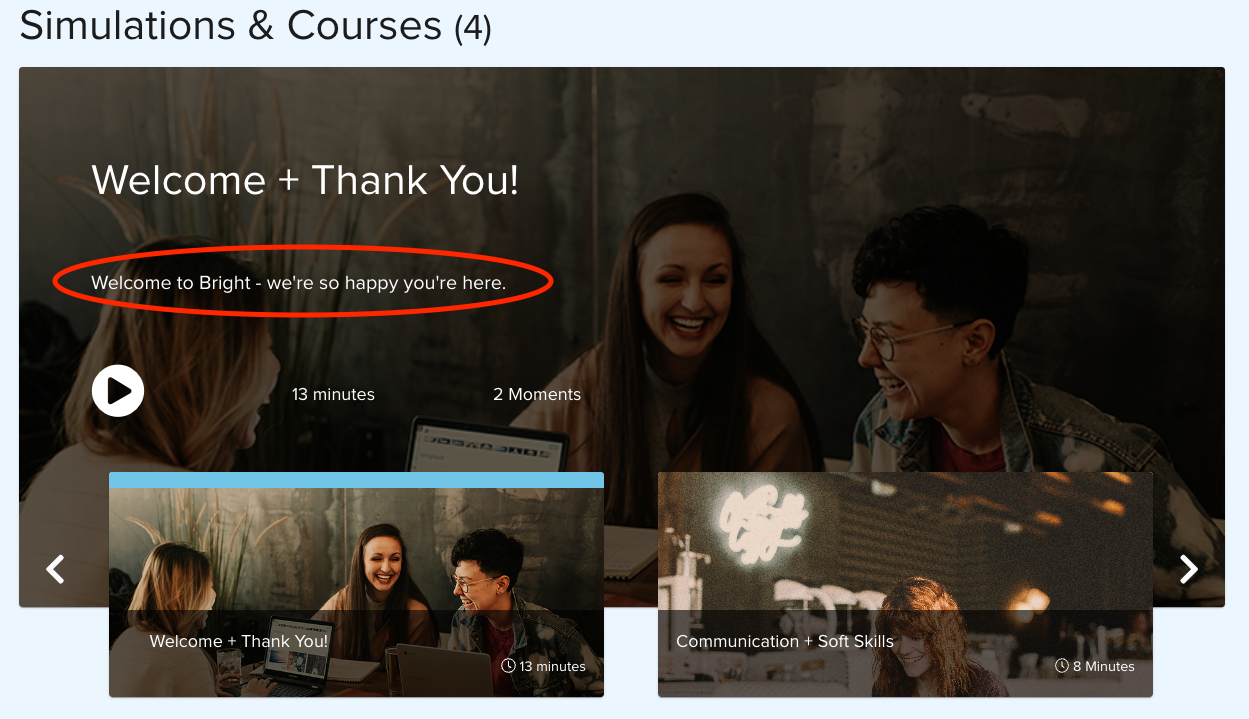
- Enter a short and long description. For Simulations, the short description will show up for the learners in My Path as well as in the carousel on the homepage. The Long Description will show up on the Simulation landing page when they click on the simulation box itself. See these examples below:
Short Description in Carousel on Homepage
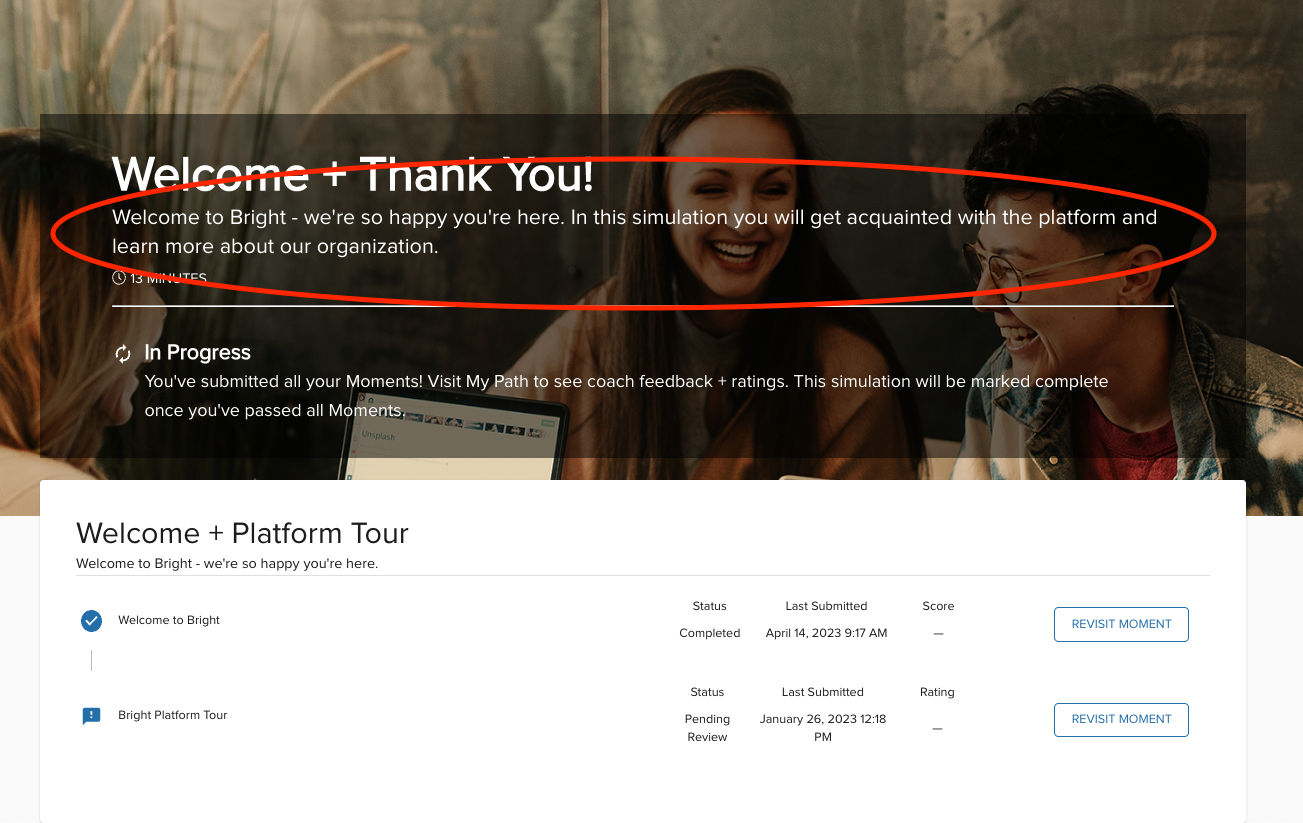
Short Description in My Path

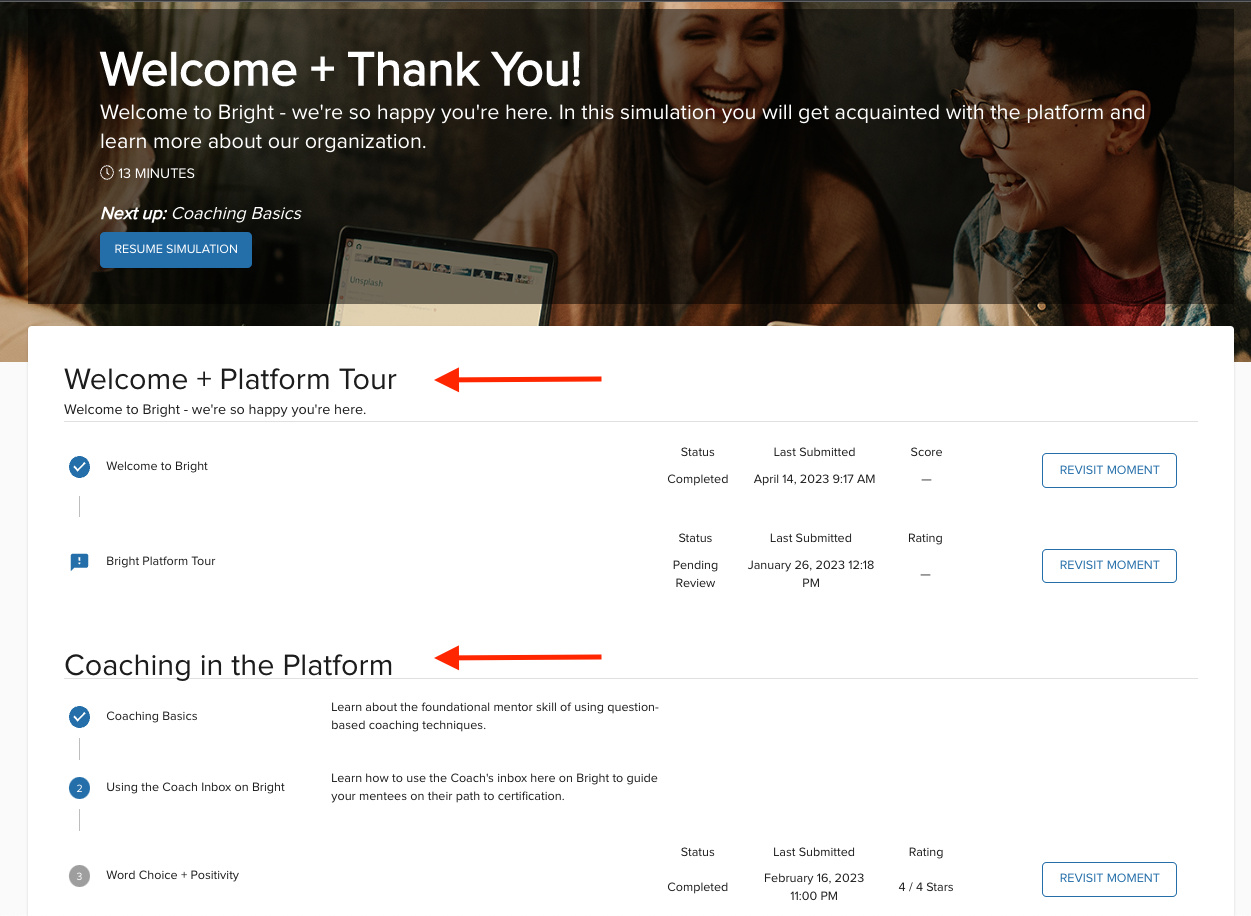
Long Description on Simulation Landing Page
- Next assign a Team Tag. This is not required however we do recommend tagging your content to the specific Admin team that this content is intended for. As you and your organization grow with the platform, this is the easiest way to organize content for your division, region, etc. To learn more about content tagging, see this related article.
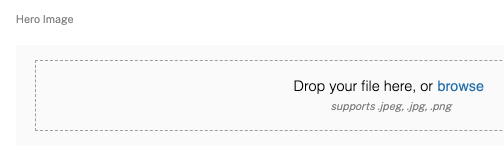
- Next, add a Hero Image. The hero image will be the backsplash image that is shown on the Simulation landing page. If you do not add a Hero image, this will just be a blank, grey screen so we recommend adding this to every simulation. The preferred dimensions for Hero images is 3840x1700px and we support .jpeg, .jpg, .png files. If you are struggling to find images, please contact your account manager who can guide you to the Bright Image library where you will find a large collection of perfectly sized images for every place in the platform.
- You must add a Thumbnail image to Simulations as well. This will be the image that is depicted in the carousel on the homepage. If you leave this blank, the carousel will just show a white box in the place where there should be a picture.
- Simulation Thumb images are a different size than Moment Thumb images. They should be 1400x700 and we support the same file types as the Hero Image. Again, ask your account manager for assistance or direction to the Bright Image library if you'd like additional help here.
- Once the details of the Simulation are complete, click 'Save' to create the Simulation. A green confirmation box will appear in the lower lefthand corner to let you know that you've successfully created the Simulation.
- Next you will need to add at least one Moment Group. Moment Groups define what 'stages' appear on the Simulation landing page.
- To create a Moment Group simply click the blue 'Add Moment Group' button and enter the name of the Moment Group. Each time you create a new Moment Group, a new tab will appear on the Simulation where you can further define the group and associate Moments and Resources. Moment Group order can be adjusted through Bright's simple drag and drop feature. If you need to edit the name of the Moment group, click on the pencil on the righthand side of the moment group box. See a short demo below.
- Next, you'll want to add a detailed description to each of your Moment Groups. Select the tab at the top for the first Moment Group that you've created and write a detailed description. Your learners will see this as a pop-up before they begin the simulation so be sure to include as much detail as necessary to set the tone for the exercises in this stage of the simulation.

- Now it's time to add moments and resources to each of the Moment Groups. Click on the 'Moments' box and the most recently edited moments will populate to the top of the menu. You can also search for moments by name or unique ID.
- Continue selecting moments until you've added all of the moments you'd like to see in this stage of the Simulation. The learners will complete each moment in the same order that you list them in the Moment Group. To change the order, simply use Bright's drag and drop feature.
- You can also remove moments from the Moment Group by clicking on the trashcan or the 'X' in the search bar.

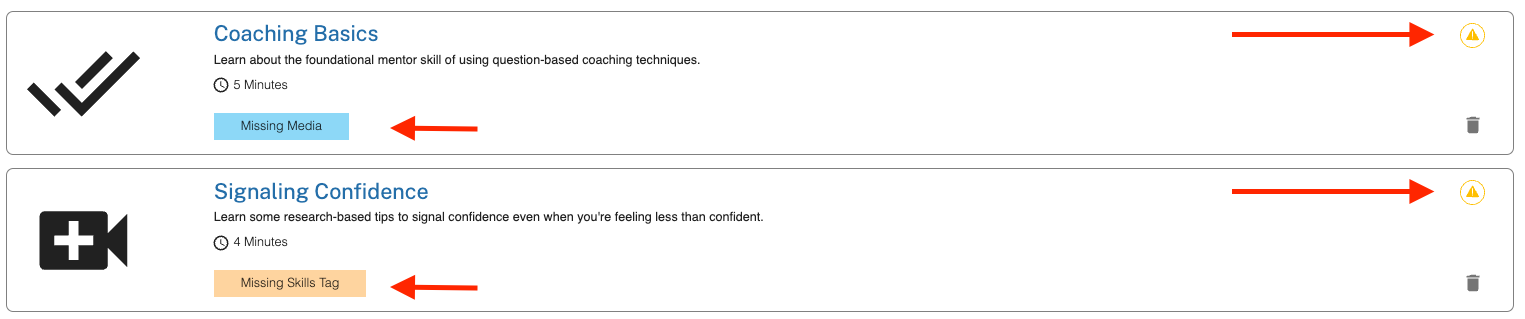
- In addition, if one of your moments is missing media or a skills tag, you will see a the following warning signs.
- You can update these details directly from the Simulation details page by clicking on the Moment. A modal will popup and you can edit the moment on the spot. Once you're done editing, click Save and continue crafting your simulation. Watch a quick tutorial below.
- You can add resources to the Simulation as well. Scroll down to the Resource section of the simulation and populate resources in the same way that you populated Moments. When a learner is on the Simulation landing page, these will appear pinned to each Moment Group.
Admin View
Learner View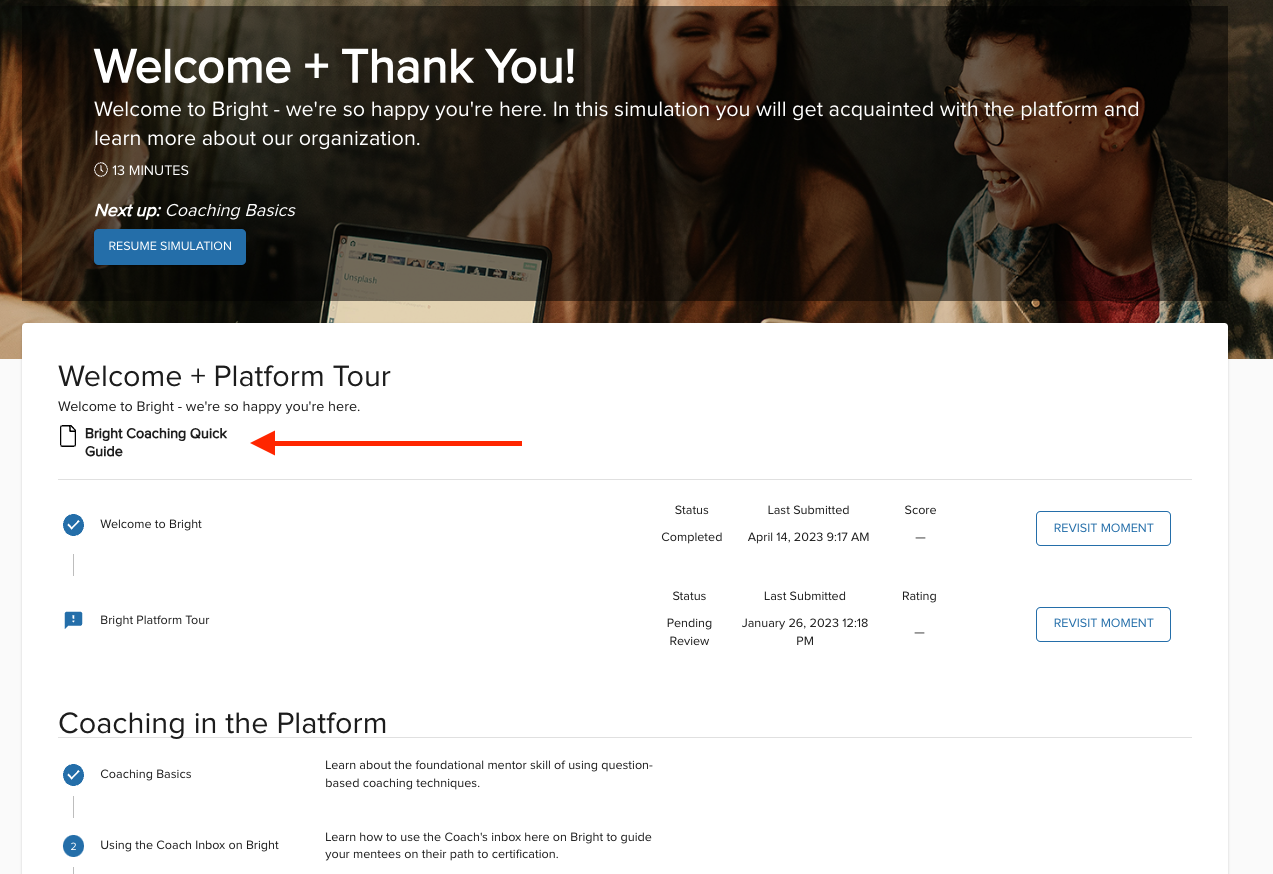
- Once you have finished creating all of your simulations it's time to put them into an Assignment Path. See our next article here to learn more!