Step-by-step instructions on how to create a moment with multiple choice questions at the end.
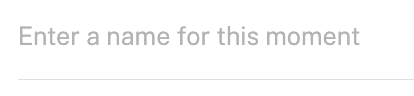
- First, name your Moment.
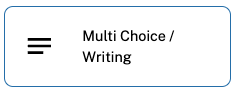
- From the Moments menu in the Admin console, select the 'Multi Choice / Writing' box as the Moment Type.
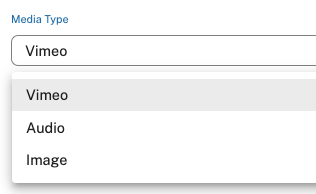
- Select the 'Media Type'. This is the piece of content that the learner will view and/or analyze before answering the multiple choice questions. This can either be a Video file (.mp4, .avi, .mwv), Audio file (.mp3, .wav, .m4a) or Image (.jpeg or .png files).
- Once you select the media type, drag the file into the media section or browse your computer to add the file.
- Next, enter the Duration. This is the time it will take the average learner to complete the exercises. It's important to leave extra time for them to the answer questions at the end after they've viewed or analyzed the media. For example, if they are expected to watch a 5 minute video and then answer 3-4 multiple choice questions, you would like set the Duration to 7-8 Minutes. Lastly, the Duration does not have to be listed in a particular format (ie. 00:00 or 5 Minutes). This is a text field so you can type whatever format makes sense. Just be sure to be consistent throughout the building process.

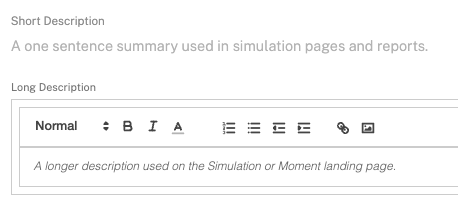
- Now enter the Short and Long description. The short description is mostly for the Admins and Coaches who will use this summary as a way to quickly see what the moment entails while building simulations or perusing the reports. The long description will be learner-facing and show up on the Simulation page and the Moment landing page prior to them starting the exercise. It's important to be descriptive in the Long description to give as much detail and direction to the learner.
- Coach Guidance is not necessary for Multi Choice moments since the Coaches will not be giving star ratings or coaching these moment types. This is essentially an automatic pass/fail exercise.
- Assign a Team Tag. This is not required however we do recommend tagging your content to the specific Admin team that this content is intended for. As you and your organization grow with the platform, this is the easiest way to organize content for your division, region, etc. To learn more about content tagging, see this related article.
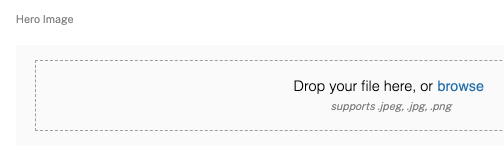
- Next, add a Hero Image. The hero image will be the backsplash image that is shown behind the piece of media. If you do not add a Hero image, this will just be a blank, grey screen so we recommend always adding this to every moment type. The preferred dimensions for Hero images is 3840x1700px and we support .jpeg, .jpg, .png files. If you are struggling to find images, please contact your account manager who can guide you to the Bright Image library where you will find a large collection of perfectly sized images for every place in the platform.
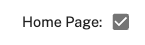
- Only add a Thumb image if your Moment will be pinned to the Home Page. You have ability to highlight Moments that you want to live on the Home Page. These moments might be exercises that you want learners to do over and over again. If you'd like your moment to live on the Home Page, be sure to toggle this option in the top right corner when creating the moment.
- Thumb images should be 800x1200 and we support the same file types as the Hero Image. The Bright team recommends leaving a 800x200 white space at the top of the image so that it fits nicely into the vignette that learners will see on the Home Page. Again, ask your account manager for assistance or direction to the Bright Image library if you'd like additional help here.
- Next, click 'Save' to create the moment. A green confirmation box will appear in the lower left corner of the page to let you know that the moment was created successfully. Now, select the 'Prompts' tab at the top of the page.

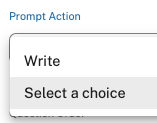
- Select the Prompt Action as Select a choice.
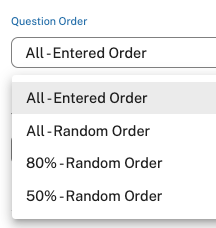
- Next decide how you you want the questions to be served up. We've included this feature to give you an opportunity to randomize the questions and avoid the chance of memorization or sharing of answers among the cohorts. There are 4 options here:
- All-Entered Order: this means ALL questions will be served up to the learner in the order that you enter them here.
- All-Random Order: this means ALL questions will be served up to the learner but in random order every time.
- 80%-Random Order: this means that 80% of the questions will be served up in random order.
- 50%-Random Order: this means that 50% of the questions will be served up in random order.
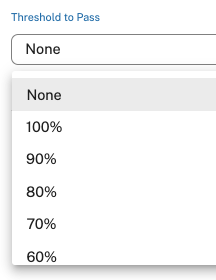
- Now select a 'Threshold to Pass'. You do not have to select a threshold but if you are entering lots of questions or using this moment type as an assessment, you likely will want set a passing score. This means that if the learner does not obtain a passing grade, we will serve the assessment up to them right away. Your options for a passing grade are: 100%, 90%, 80%, 70%, 60%, 50%.
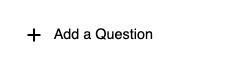
- Now you can begin adding questions! Select the plus sign next to 'Add a Question'.
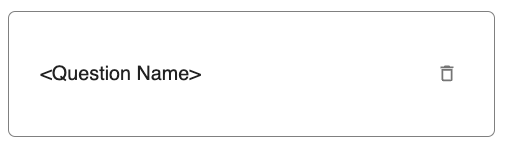
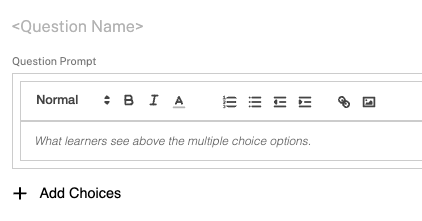
- Now click on the box with <Question Name> to customize it.
- You can now name the question for ease of reference, but most importantly you will want to fill in the Question Prompt. This is what the learner will see above the multiple choice selections and should be the question itself. Once you've entered in the question, click the +Add Choices button.
- This is where you will begin adding the different multiple choice options. Enter the first option that you want displayed to the learner in the 'Option Name' field.
Next, enter the 'Rationale'. This is what the learner sees when they select this option. If the option is correct, you should enter WHY the answer is correct. If the option is incorrect, you should give context as to WHY the answer is incorrect. For example, if the question is 'What color is the grass?' and the option is 'Purple' and it is the Incorrect option, you might write: The color of the grass can indicate the health of the lawn, but we do not see Purple grass. Try again.
Finally, choose the 'On select' option. Typically you will want this question to End and move on to the next question, however you do also have the option to 'Play Media' upon selection of the option. If you choose to play media, you will have the select the media type and add the file to the details. When you are finished, select Add Choice.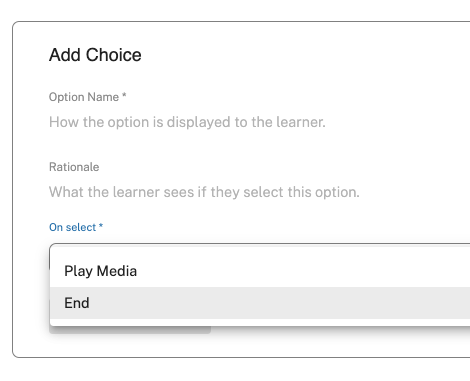
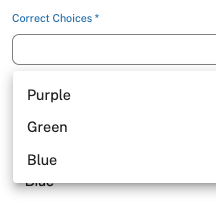
- Repeat step 18 until you have entered all of the options for that question. Once you have finished, you must select a 'Correct Choice'. If you do not select the correct choice, there will be a warning and this moment will not allow learners to progress. Back up in the details section where you typed out the question, click on the 'Correct Choice' box and select the correct choice.
- Repeat steps 15-19 for each question that you would like to add to this moment. Once you are done, click 'Save and Close' at the bottom and this will take you back to the Moment Menu in the Admin console. If you are adding an assessment, please see the steps in the Bulk Moment Import article to help you add many questions at once.
Under rare circumstances, you may want to create a "Click to Continue" type moment. Really the ONLY time this makes sense is if we want to have the learner review media (video, image, or audio) then immediately practice a system simulation. In these cases, leave the question blank and only provide one answer choice that says "Continue". This image shows the full example of the moment settings to provide the learner a simple click to continue experience.
