Writing Moment Creation
Step-by-step instructions on how to create a moment with a writing exercise at the end.
- First, name your Moment.

- From the Moments menu in the Admin console, select the 'Multi Choice / Writing' box as the Moment Type.

- Select the 'Media Type'. This is the piece of content that the learner will view and/or analyze before answering the prompt/questions. This can either be a Video file (.mp4, .avi, .mwv), Audio file (.mp3, .wav, .m4a) or Image (.jpeg or .png files).
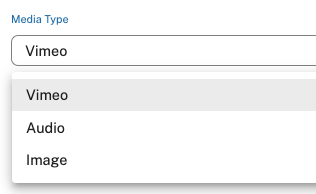
- Once you select the media type, drag the file into the media section or browse your computer to add the file.
- Next, enter the Duration. This is the time it will take the average learner to complete the exercises. It's important to leave extra time for them to the answer questions at the end after they've viewed or analyzed the media. For example, if they are expected to watch a 5 minute video, do some research and then come back and give a 2-3 sentence response, you would like set the Duration to 10-11 Minutes in order to account for the extra time to finish the exercise. Lastly, the Duration does not have to be listed in a particular format (ie. 00:00 or 5 Minutes). This is a text field so you can type whatever format makes sense. Just be sure to be consistent throughout the building process.

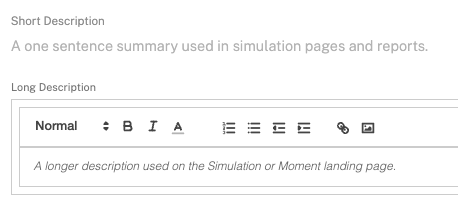
- Now enter the Short and Long description. The short description is mostly for the Admins and Coaches who will use this summary as a way to quickly see what the moment entails while building simulations or perusing the reports. The long description will be learner-facing and show up on the Simulation page and the Moment landing page prior to them starting the exercise. It's important to be descriptive in the Long description to give as much detail and direction to the learner.
- Enter the Coach Guidance. This is an important step to ensure rating consistency across the team of coaches who will be giving your learners feedback on this moment. The coaching guidance should align to your quality standards and expectations for this exercise. They will be expected to give a 4-star rating so you should also include detail about what each star means in this moment. Remember that 3 or 4 stars is considered passing and a 1 or 2 star rating will require the learner to resubmit a response. Lastly, we recommend including the learner prompt in your coach guidance so they can easily reference the details of prompt and what you've asked the learner to do. If you need more information or best practices, please see our article on Coaching Basics.

- Assign a Team Tag. This is not required however we do recommend tagging your content to the specific Admin team that this content is intended for. As you and your organization grow with the platform, this is the easiest way to organize content for your division, region, etc. To learn more about content tagging, see this related article.

- Next, add a Hero Image. The hero image will be the backsplash image that is shown behind the piece of media. If you do not add a Hero image, this will just be a blank, grey screen so we recommend always adding this to every moment type. The preferred dimensions for Hero images is 3840x1700px and we support .jpeg, .jpg, .png files. If you are struggling to find images, please contact your account manager who can guide you to the Bright Image library where you will find a large collection of perfectly sized images for every place in the platform.

- Only add a Thumb image if your Moment will be pinned to the Home Page. You have ability to highlight Moments that you want to live on the Home Page. These moments might be exercises that you want learners to do over and over again. If you'd like your moment to live on the Home Page, be sure to toggle this option in the top right corner when creating the moment.

- Thumb images should be 800x1200 and we support the same file types as the Hero Image. The Bright team recommends leaving a 800x200 white space at the top of the image so that it fits nicely into the vignette that learners will see on the Home Page. Again, ask your account manager for assistance or direction to the Bright Image library if you'd like additional help here.
- Next, click 'Save' to create the moment. A green confirmation box will appear in the lower left corner of the page to let you know that the moment was created successfully. Now, select the 'Prompts' tab at the top of the page.

- Select the Prompt Action as 'Write'.
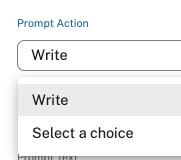
- Next, enter the learner prompt and a detailed description of what you'd like the learner to respond to in the 'Prompt Text' field. We recommend giving as much detail as possible here. We also encourage you to include information about the steps they should take to submit their answer and the expectations for how long it will take for a coach to give them asynchronous feedback.
For example, you might ask the learner to analyze an image of an insurance claim and respond in writing whether or not the member qualifies for a certain benefit and why. After this prompt, you might also include something like:
"Once you have written your response and you are happy with the details, click 'Submit to Coach'. Our coaching team will provide detailed feedback within the next 24 hours. If you see your alert bell highlighted on the homepage, you can navigate to My Path to read your rating and feedback. We use a 4-star rating scale and you must receive 3 or 4 stars to pass. If you receive 1 or 2 stars, you will be expected to resubmit your response. Good luck!"

- Once you've completed the prompt, you will need to tag the moment with Skills. Click the 'Skills + AI' tab at the top.

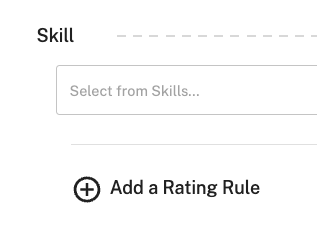
- Click Add a Skill / Rating.

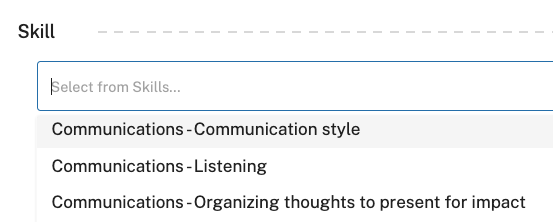
- Select from the Skills in your library. You can select multiple skills for an individual moment and the coaches will be expected to give a 4-star rating against each skill. For example, you might select a skill related to their 'Grammar' and also select a skill related to their 'Product Knowledge'. Someone might have the product knowledge but there are mistakes in spelling or syntax. You can add multiple skills by repeating steps 15-16. If you do not see any skills, this means that you have not added any to your library. You will have to navigate to the Skills menu and add skills before being able to assign skills to this moment. See more information about this in our Skills Library article.
- Lastly, Writing and Audio moments have the option to be rated by the Bright AI-Coach. If there is a somewhat standard answer for this moment or certain terms that you would expect every learner to include in their submission, we would recommend turning on the AI-Coach. If each answer for this submission will be nuanced and require a human coach, you can select Save + Close to return to the Moments menu. Human coaching will lean more heavily on the information in the coach guidance.
To turn the AI-Coach on select, 'Add a rating rule' under the skill that you have selected. This will open the AI building tool. For more details on how to craft AI rules, please see our article on AI Rule Creation and Best Practices.
